Solid Channel
User manual for version 1.0.6 · November 2026
1. Installation and licence
On macOS, run the installer package. It installs the AU, VST3 and AAX versions. On Windows, the installer
puts the VST3 into the standard VST3 folder. The Windows AAX version is not ready yet and will come as a free
update. On Linux, unpack the archive and copy PAA Audio Solid Channel.vst3 to ~/.vst3.
Without a licence the plugin runs as a demo. Everything works, but every 100 seconds a few seconds of quiet noise are mixed into the output. After buying you get a licence file by email. Right-click anywhere on the plugin, choose Activate License... and select the file. You only do this once per computer; the other instances in your projects pick it up too. The licence is tied to your name and email address, not to a machine, and there is no online check.
2. Signal flow
The channel follows the order of the console it is modelled on. The audio passes the input stage, the filters, then the equaliser and the dynamics section, and leaves through the fader.
input (LINE or MIC, PHASE)
  -> HPF / LPF
  -> DYN IN:              dynamics -> EQ
     DYN IN + CH. OUT:    EQ -> dynamics
     IN off:              EQ only
  -> fader -> output
IN switches the dynamics on and off. On its own it puts the compressor and expander before the EQ. CH. OUT only moves them behind the EQ; with IN off, CH. OUT does nothing.
3. Input and output
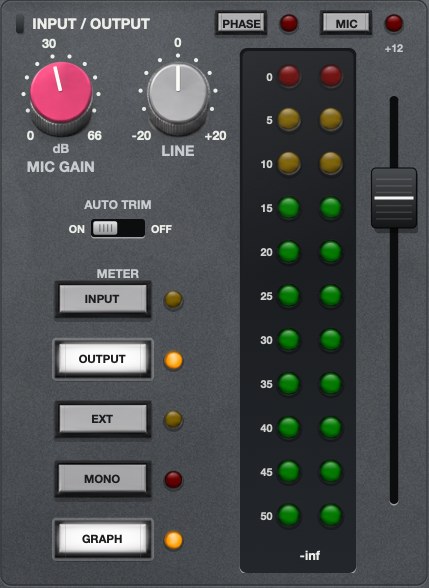
| Control | Range | What it does |
|---|---|---|
| LINE | -20 to +20 dB | Gain of the line input stage. Turning it up drives the stage harder. |
| MIC | on / off | Switches from the line input to the microphone preamp. |
| MIC GAIN | 0 to 66 dB | Gain of the microphone preamp. Only active with MIC on. |
| PHASE | on / off | Inverts the polarity of the input. |
| AUTO TRIM | on / off | With AUTO TRIM on, the gain you add with LINE or MIC GAIN is taken back at the output. You hear the stage being driven harder, but the channel does not get louder. It compensates the gain, not the peaks: when you drive the stage into saturation, the peaks get flatter and the channel gets a little quieter. That is the saturation you are hearing. Off, the knobs behave like on the console. |
| Fader | off to +12 dB | Output level. The top part above 0 dB is extra headroom that the console fader does not have. |
The meter next to the fader shows the input or the output, depending on which of the two buttons is lit. EXT and MONO are described in section 9, GRAPH in section 10.
With MIC on, 0 dBFS corresponds to -10 dBu at the preamp input. A MIC GAIN of 30 dB lands at about the same level as the line input at its centre position.
4. Filters
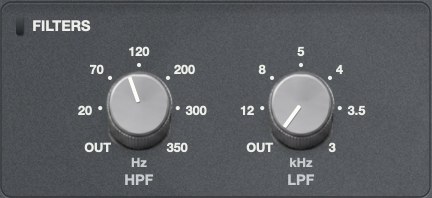
| Control | Range | Notes |
|---|---|---|
| HPF | OUT, 20 to 350 Hz | High-pass filter. Fully left is off. |
| LPF | OUT, 12 to 3 kHz | Low-pass filter. Fully left is off. |
Both filters can be moved from the audio path into the sidechain of the dynamics with the DYN SC button (see routing).
5. Equaliser
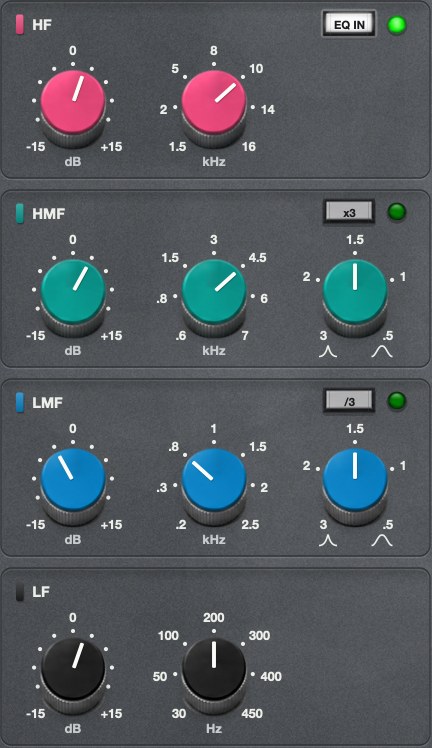
| Band | Gain | Frequency | Q |
|---|---|---|---|
| HF | ±15 dB | 1.5 to 16 kHz | shelf |
| HMF | ±15 dB | 0.6 to 7 kHz, with x3: 1.8 to 21 kHz | 0.5 to 3 |
| LMF | ±15 dB | 200 Hz to 2.5 kHz, with /3: 67 to 833 Hz | 0.5 to 3 |
| LF | ±15 dB | 30 to 450 Hz | shelf |
x3 multiplies the frequency range of the high mid band by three, /3 divides the range of the low mid band by three. EQ IN switches the whole equaliser in and out. The filters are not affected by it.
The Q knobs run from narrow (3) on the left to wide (0.5) on the right, as printed on the panel.
6. Compressor
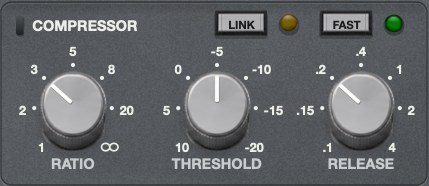
| Control | Range | What it does |
|---|---|---|
| RATIO | 1:1 to ∞:1 | At 1:1 the compressor does nothing. Fully right it works as a limiter. |
| THRESHOLD | +10 to -20 dB | Level where compression starts. |
| RELEASE | 0.1 to 4 s | How fast the gain comes back. |
| FAST | on / off | Off: the attack depends on the programme material. On: a fixed, short attack. |
| LINK | on / off | Stereo only. Both channels share one control voltage, so the stereo image does not move. |
The compressor has no make-up gain knob. Like on the console, the gain lost to compression is made up automatically depending on ratio and threshold.
7. Expander / gate
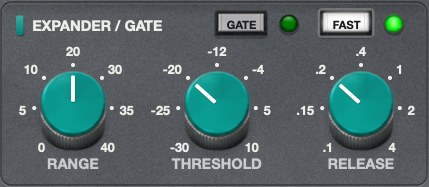
| Control | Range | What it does |
|---|---|---|
| RANGE | 0 to 40 dB | Maximum reduction below the threshold. At 0 the section is inactive. |
| THRESHOLD | -30 to +10 dB | Level below which the signal is reduced. |
| RELEASE | 0.1 to 4 s | How fast the reduction sets in after the signal falls below the threshold. |
| GATE | on / off | On: gate, it closes completely down to the range. Off: expander with a gentler slope. |
| FAST | on / off | On: fast attack. Off: slower attack, softer on drums. |
8. Gain reduction and MIX
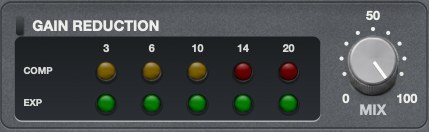
The upper LED row shows the compressor's gain reduction at 3, 6, 10, 14 and 20 dB, the lower row the same for the expander or gate. On a stereo track the LEDs follow whichever channel is reduced more.
MIX blends the signal before and after the dynamics. At 100 you hear only the processed signal, as on the console. Lower values give parallel compression without a second track.
9. Routing and sidechain
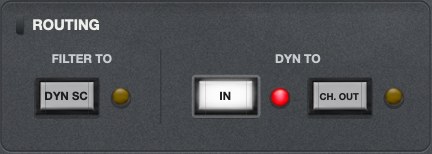
| Button | What it does |
|---|---|
| DYN SC | The HPF and LPF leave the audio path and filter only the signal the dynamics listen to. Typical use: HPF up so the bass drum does not pump the compressor on a full mix. |
| IN | Switches the dynamics on and off. Without CH. OUT they sit before the EQ. |
| CH. OUT | Moves the dynamics behind the EQ. Only has an effect while IN is on. |
| EXT | The dynamics listen to the sidechain input of your DAW instead of the channel. The DAW has to send a signal to the plugin's sidechain input; otherwise EXT has no effect. With DYN SC on, the filters act on the external signal. |
| MONO | Sums left and right before the channel. The plugin then runs one channel instead of two, which also halves the CPU load. |
10. Graph panel
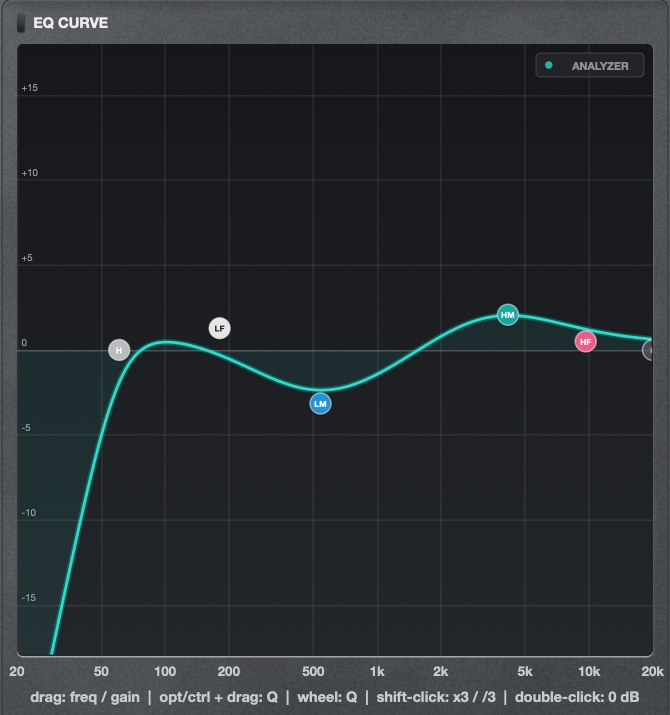
GRAPH shows or hides the right-hand panel. The curve is calculated from the same circuit as the audio, so it shows what the channel actually does, including the interaction between the bands.
The handles can be moved with the mouse:
- drag: frequency and gain
- Alt (macOS: Option) or Ctrl + drag, or the mouse wheel: Q
- Shift + click on the HMF or LMF handle: x3 or /3
- double-click: gain back to 0 dB
ANALYZER shows the spectrum of the output behind the curve.
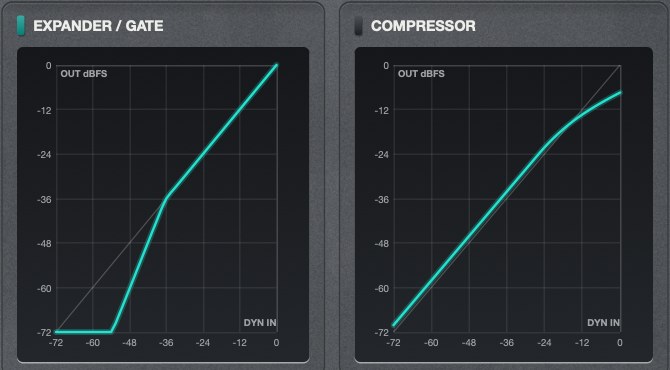
Above the EQ curve the panel draws the static input/output curves of the expander and the compressor for the current settings. They are measured from the model with slow level steps, so they include the soft knee and the make-up gain. These curves are for display only; set the dynamics with the knobs.
11. Right-click menu and presets
A right-click anywhere on the plugin opens the menu.
| Entry | What it does |
|---|---|
| Presets | Factory presets for vocal, kick, snare, toms, overheads, bass, acoustic and electric guitar and a peak limiter, your own presets, Save Preset As, Save Current as Default, Reset to Factory Defaults, Copy and Paste Settings, Open Preset Folder. |
| Self Noise | On by default. The channel adds its own noise and a little mains hum from the power supply, at the level of the real unit. Switch it off if you stack many instances and do not want the noise to add up. |
| Window Size | Sets the plugin window to 50, 75, 100, 125, 150 or 200 percent. 75 percent is the default. You can also drag the lower right corner. The size is saved with your project, and new instances open at the size you used last. |
| User Manual | Opens this manual in your browser. |
| Activate License... | Loads the licence file. Once licensed, the entry changes to Replace License File. |
User presets are plain files in the preset folder. You can copy them to another computer or send them to someone. Copy and Paste Settings use the clipboard, which is handy for moving settings between two instances.
12. Stereo, latency, CPU
On a stereo track the plugin works like two channels of the console. The two channels are not identical: the left one has slightly different component values, as two real channels would. With LINK on, the two compressors are coupled.
The plugin runs internally at a higher sample rate and reports a small latency to the DAW, which compensates it. Bypass keeps the same latency, so switching it on and off does not shift the track.
Solid Channel calculates the circuit while the audio runs through it. That needs more CPU than a typical EQ or compressor plugin, and the load rises a bit on loud passages when the dynamics work hard. Use the demo to check it on your system before buying. Supported sample rates are 44.1 to 192 kHz.